February 25, 2009

Smoothing the new finish

Well, I'm quite tired. I can barely make a fist. My forearms burn with every letter I type so I probably won't be too wordy.
All day I have been sanding and I'm about 3/4's done with smoothing things out. Boy am I beat. And I'm not doing the majority of the work either!
Meet the work horse:


I don't know how people got on without power sanders. Wear a dust mask because that powder will make you sick.

Anyway, after washing down the hull, I had to attack this fine mess:


That was gel coat damage that didn't reach the fiberglass. I had routed out the cracks with a Dremel then filled with gel coat. All of the excess had to be taken away. It's simple, dull work but it has to be done. Sand away until things are flush.


After a while, the new color will fade and blend in with the old and this should be hardly noticeable.


Now, let me show you how the bow is doing.


This is before gel coat:


This is after:


Much better, huh? She no longer looks like that annoying ugly bucktoothed kid that chased you around at recess wanting a kiss.


Things are blending well. I'll finish with this task then move on to making that finish sparkle by wet sanding. Somewhere in there I'll fix the bow handle. So, the plan is, aside from a "how to" on the bow handle, there won't be another update until I unveil her sparkling shiny reborn self with her sail up and ready to take off across the water.

Until then, these are pictures of places which had been damaged. Can you spot the repair?


Could you see it? How about this one:


Any luck?


What about these-


There was a big gaping hole here. Would you have noticed?


How about this one? Aside from the color mismatch, would this previous hole have jumped out at you?


I've got some work to do. I'll see ya again when my bow handle gets here.


"We shall neither fail nor falter; we shall not weaken or tire...give us the tools and we will finish the job." ~Winston Churchill


Next >

February 24, 2009

Gather 'round.

Please regard these next few pictures carefully for they hold historic value. These are the last pictures that will be taken of the damaged boat:


Because all of that damage is tucked away under brand spanking new smelly gel coat!


Lets give this boat a round of applause folks. This is quite a milestone. She's been sitting so patiently waiting for this day, never yelling at me, never asking if I really knew what I was doing, just quietly appreciating that someone was taking the time. If she could, she'd crack open a bottle of wine in celebration of this victorious day.
But she can't so I guess I'll have to.
Muwha! <---rich snobby person chuckle


Okay, back to business. There's a bunch of sanding to be done. A. Bunch. I will have arms of steal after this.
Still, I'll get that surface as smooth as pudding, finish removing that one wood grain sticker, decide on stripes ( to update her and add some pizazz), and fix the bow handle. Then, we're going sailing, woot!


I do believe I caught the ol' gal smiling...


"When you do nothing, you feel overwhelmed and powerless. But when you get involved, you feel the sense of hope and accomplishment that comes from knowing you are working to make things better." ~Anonymous


Next >

February 22, 2009

Inspection ports

Now that I've spent countless hours repairing holes in my boat, I decided today that I had grown tired of a sound boat and that I needed to put some holes in it.

You what?

Meh, I was bored.


I also need to be able to repair the bow handle. And, because of "Dolly", I should have a way to keep tabs on the rudder mount. And the rudder mount may need attention simply from wear and tear anyway. Then, I'd also like a place to put my ID, keys, cell phone, and maybe a drink.

So, a few weeks ago, I emailed Annapolis Performance Sailing and said, "Hey, I noticed you sell inspection ports and cat bags."
They said, "Why yes we do."
I said, "Well send me a few of them there things. Oh, and I'd like that there cat bag too."
They said "Sure! No problem!"
I asked, "Is a cat included in the cat bag?"
They said, "Nope."
Shucks. Well, I ordered things anyway and within a week, a UPS truck showed up.

Mine are the 5" variety. 4" is generally recommended on the bow but I can't stand not having room to work. So mine are 5", white, and the lids screw on. The inside of the boat isn't really pretty so I didn't want clear lids.

Anyway, while it's too cold to mess with gel coat on the deck like I wanted, it wasn't too cold for handy dandy 60 year old jig saw to come out and play.
I taped the underside so it wouldn't scratch up my less than perfect finish. He's old, but he's still fierce!


I've seen instructions saying to whip out your compass and draw a circle, but I'm not nerdy enough to own a compass. *snort*
So I obsessed a little over whether or not the port was centered, then used a pencil to trace the outside. When done with that, I used a drill to put a hole in where I would start with the jig saw.


Once you've sawed a circle, pull the jig saw and sit down while your heart pitter patters over what you've just done. If you develop chest pain, go to the ER.


Once recovered, take a screw driver and start working that circle off. There's foam attached to it underneath and it doesn't want to let it go. So be gentle.

Here's what I found when it popped off.


The yellow foam is the "glue". The white foam are the "blocks". And boy have they loaded up this hull with foam!

Now, here is one important reason to install these ports. The foam blocks do very well floating in liquid water. However, vapor can penetrate it and it becomes water logged. So, for simple preventive maintenance for your foam blocks, you can uncork these ports and let them dry out. This isn't a problem with boats which don't leak. However, this one is over 30 years old (1974 judging by it's hull number) and so it may have some spots like in the hull joint which haven't made themselves known.
These foam blocks are a major pain to replace so it's easier to have a way to allow them to dry.

Where was I...

Ah yes, so you peer into the hole and find foam in your way. You have to dig it out. I used a combination Dremel and knife. I want to leave as much foam as possible so up in the bow, I only removed what would get in my way for the handle repair.


Now this is exciting stuff. I've searched the internet far and wide and nobody has really documented where the blocks are on the Minifish. They have on the Sunfish, but not its smaller sister. So, for those wondering and appreciative of my bravery, here is where the block stops in the bow...
First a picture to orient you from the hole and the bow:


The red line is where the block stopped...


...which is about here when you look at the boat from the outside:


I could have moved the hole further up, but I don't have the handle and needed to leave enough room.

For curiosity's sake, here's a look up into the bow:


I took my trusty shop vac and vacuumed out those pieces of foam. Minifish wouldn't want parts left laying all over so it was the right thing to do.

The next step is to test fit the port. It's easier to enlarge a hole than to shrink it. Slow and steady wins this race.
I got a lovely fit.


I'll wait to seal this one until after I've fixed the handle, but here it is with the lid on:


Wow, deck ports! Just like a big boat!


Okay, so I was done with the fore port. It was time to cut the aft port (vocabulary practice again). This is where my belongings will be stowed away.
So again, same thing. Trace, cut, rest and avoid a panic attack, dig out the foam and here you go...the inside of the rudder mount looking nice and strong and ready for action:


Drawings on a sunfish would show you that a block does not go all the way to the stern. In fact, a 5" port would fit without digging through a block (again, by drawings I've seen). On a Minifish, it extends to merely an inch or so from the stern.


Not knowing how thick things were, I waited until I had seen the inside before getting screws. I ended up purchasing 1" long screws with tapered heads. You could get away with shorter however, I found the length was easy to work with when threading a nut.

I fitted the port down into the hole and drilled one hole using the port as the guide for where the holes would be. I drilled one hole at a time and dropped a screw in to hold it in place so all the holes would line up.

Now it's time to seal things up and for good. You'll need marine caulk or equivalent to seal the port.

Here's an illustration of what you want:


I ran a bead around the bottom of the port where it meets the deck. I slipped it in and gave the port a 1/4 of a turn to make sure things were sealed. I then dabbed caulk where the screws go and tightened things down. I used a similar pattern to how you tighten a wheel on a car. You tighten a screw, move to the screw opposite of it and tighten, etc. That way it goes down as evenly as possible which will help keep it sealed. Wipe away the excess using acetone and you should get this:


Good seal:


So, When things are cured, drop in the cat bag minus the cat:


Then screw on the lid:


And your boat will keep your things with you even in a capsize.

Note: Not all catbags are waterproof so ye be warned.


"There's no thrill in easy sailing when the skies are clear and blue, there's no joy in merely doing things which any one can do. But there is some satisfaction that is mighty sweet to take, when you reach a destination that you never thought you'd make." ~Anonymous


Next >

Meet "Dolly".

"Dolly" has graciously volunteered to help me move my boat around after having built her myself.


I simply lift by the handle of the bow and off we go with "Dolly" faithfully holding the other end. This should help me get the boat from the truck to the beach by myself. What a helpful little thing. Don't laugh at my booger welds for this was my very first welding project and it would hurt "Dolly's" feelings.

The axle:
The axle is homemade. At the end of the tube are bolts which are welded in place with washers. The tires and wheels came from Tractor supply and have bearings already installed. It's nothing special and works for low speed. I wouldn't dare trailer on this.

The mount:
Today, I finally got around to welding in the spacer and mount so I could finally move my boat around without another pair of hands.

I'll be repainting the bare parts shortly in that nice lovely shade of red by Rustoleum that you see on the rest of it. The black pipe serves as a spacer to support the rudder mount.


And then the washers are used to keep things perfectly aligned for the bolt the same size as the rudder's.
The carpet is an out door carpet from Home Depot. Well see how everything works. It did just fine moving it around in the back yard this afternoon for today's tasks.

Coming next: inspection port installation!

February 20, 2009

Progress

Well, well, well...a sunny glorious day in the seventies and I had to remove myself from the couch, stretch, and shield my eyes from the sun. The day was golden, just perfect for applying gel-paste.
So I readied my supplies:


I learned a lot of things that day (the day before yesterday). There was a mishap, which I will tell you about first. Then, certainly clean your ears, your glasses, and pay attention because I am going to advise you on a few "What NOT to do" lessons that I learned.

First, the mishap. Evercoat has this wonderful product that is called a gel-paste. It's great for filling in gouges. It was perfect for my application. However, the Evercoat can I bought was not perfect.
I had taken pictures of the goal for the day.


I cut pieces of plastic and taped them so all I'd have to do is spread on the paste, place the plastic over, and I'd have a nearly invisible fiberglass patch, right?
Wrong.

As I tinted the neutral product white, I became concerned that it was still see through. When I added the hardener, I noticed the product turned blue.
Odd because the hardener is clear. Well, I figured when it cured it would improve.
No dice.
I covered with plastic as recommended by many online sources. The plastic shrank, curled, wrinkled and ruined the finish. On top of that, the gel-paste remained a blue color and made the gouges I was filling in more visible.

I was gutted. Completely gutted.

I contacted Evercoat who confirmed it had gone bad. They were very nice and pleasant and say I deserve a refund.
This product is still a wonderful thing especially since I had gone ahead with regular gel coat and know the benefits this product gives, but heed this advice: If you need white, don't use the neutral color to start with. Find the white paste...even if you have to order it online. The coverage will be much better.

I was so upset over this mishap that I didn't even write about it the day that it happened. My perfect finish was now ruined. I had spent hours on it before. I was mad.

24 hours later, I had calmed down and realized it's all completely fixable. It took a few hours this morning to sand things down and retrace the cracks with my Dremel, but by noon today I was back at where I had started two days ago.


And now, here is today's feature of:

WHAT NOT TO DO


First, research what to use to cover your new fledgling gel coat. Gel coat gets along with some things, but not all. Drop sheet plastic is something gel coat really hates. So...


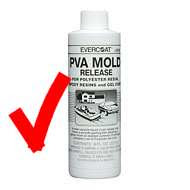
Instead, purchase the PVA mold release which has been recommended by many a manufacture of gel coat and gel coat like products for friendly, hassle free gel coat curing.


Another thing. Just because you saw it on TV doesn't mean you should do it. You may have missed important details. To me, it looked like a normal plastic bathroom cup. In real life, what was on TV that some strange man was using to mix gel coat, was not a plastic bathroom cup. So...


Approximately 1 second after adding the hardener, the bottom of the cup fell out. It made me curse.


Okay, so that was the short "what not to do" section. Now lets get on with covering these patches and gouges.

The gel coat I ultimately went with is made by West Marine and is a non-waxed version and in white. WHITE!!! LIKE 90% OF THE BOATS OUT THERE, WHITE!!!
(that's for all boat supply stores who seemed to have missed that memo-they have all colors of the rainbow except for WHITE)
Something important to know about gel coat made for repairs. Some contain a wax. Some don't. Those that have wax will cure on their own. The versions without wax need a barrier from air or else they will remain tacky.
Why on earth would you want a tacky cure, you ask? I'll tell you. If you're filling in gouges and will be building layers of gel coat, a tacky cure allows you to add another layer without having to sand. When you're done, you put a barrier over it to keep air off of it and it cures to a hard finish. If you're only putting on one coat, the waxed version will do and you won't need PVA mold release. The barrier is the wax.

Okay, it can be difficult to mix the right amount of hardener and gel coat. However, the metric system makes it easier on us as does Google.
The paste I had been working with said 4 drops of hardener to every teaspoon of paste. One teaspoon = 5 mL. Syringes measure in cc's and 1 cc = 1 mL. So you see how that can be easy?


Booyah!


^that thing there is better than Advil.


This West Marine gel coat said 1 tube of hardener to 1 can of gel coat.
That didn't help me too much since I'm not using even half a can. But I found instructions saying 1 ounce of gel coat to 12 drops of hardener. Hmm...I don't having anything measuring in ounces (hmph...I just now noticed my trusty syringe did have the ounce measurement). But google says 1 ounce = approximately 30 mLs.
I can do that.
And 30 mL's was roughly how much gel coat I could work with before it started setting up. Perfect.
So, first things first, mask off what you don't want gel coat on.
The ID number on the hull...we don't want to cover that up. That proves that she's a veteran of water.


And we can't go over the sticker because I haven't decided what to do about that just yet.


Next, I had to wash it. That's pretty self explanatory.

I let it air dry and set up my table. I put on latex gloves and kept my nose to the grind stone.


But first, before I display results, I wanted to ask...
You know that guy who always wants to help out but ends up messing things up? And you know he wouldn't understand if you told him to get lost so you just deal with it?

Well, meet that guy:


Ugh, bugs love the smell of this stuff for some reason. Even a bee wanted to drink from the cup.


Anyway, on to the revealing...

Now you see it:


And now you don't:


:-)


Now you see it:


Aaannnnnddd, now you don't:


Alright, so you can see it a little, but that's because I haven't feathered it in or made the rest of the old gel coat pretty.

She hasn't looked this complete in a while!


Here's the port side (I'm practicing my vocabulary):


So, after two sometimes three layers, I had the gel coat thick enough to where I'm 90% sure it'll smooth out. My back was hurting and I think I killed some brain cells sniffing those fumes.

So, then it was time for the PVA mold release. They say to use this make a spray can they sell. Mine didn't work so I went with a cup and brush. The purple helps to see what you've gone over on a white boat (it seems PVA knows there are more WHITE boats than purple...heh...figure that).

With the purple highlighting everything, now do you see why I didn't get it in the water by last August?


Dang it! >:-(


"There is no difference between a pessimist who says, 'Oh it's hopeless, so don't bother doing anything,' and an optimist who says, 'Don't bother doing anything, it's going to turn out fine anyway.' Either way, nothing happens." ~Yvon Chouinard


Next >